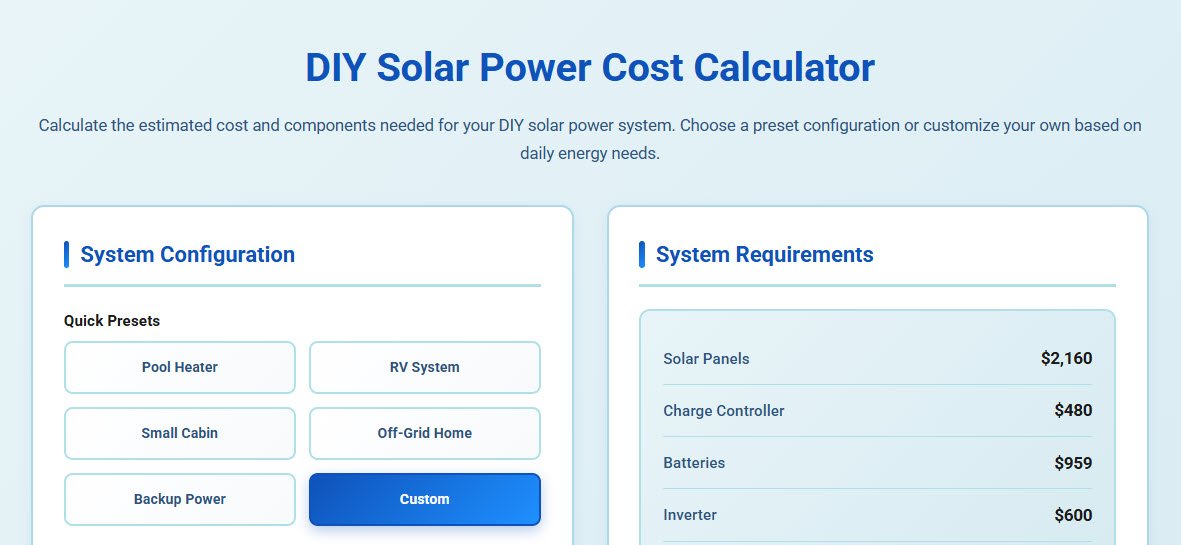
DIY Solar Power Cost Calculator
Calculate the estimated cost and components needed for your DIY solar power system. Choose a preset configuration or customize your own based on daily energy needs.
Key Takeaways
The accuracy of your DIY solar calculator results depends entirely on the quality of your input data, because garbage in means garbage out applies absolutely.
Always size off-grid systems based on worst-month solar data as opposed to annual averages, which can lead to 40-60% undersizing for winter performance.
Battery depth of discharge fundamentally changes usable capacity because a 200 AH lead-acid battery at 50% DOD provides the same usable storage as a 110 AH lithium battery at 90% DOD.
Temperature derating reduces panel output by 20-25% in hot climates and reduces battery capacity by 25% in cold climates, factors that basic calculators consistently miss.
System voltage selection between 12V, 24V, and 48V affects cable requirements, component costs, and efficiency in ways that can swing total system cost by 15-20%.
Inverter efficiency varies dramatically with load percentage, making many smaller inverters more effective than one large inverter for systems with variable loads.
Real-world system losses from cables, converters, temperature, and dust typically total 20-30%, requiring safety factors that most simple calculators fail to adequately address.
When I first started looking into solar energy for my own projects, I felt completely intimidated by the sheer number of calculations involved. How many panels do I actually need? What size battery bank makes sense?
Will my charge controller handle the load?
These questions kept me up at night, and I quickly realized that guessing was not going to cut it.
Solar calculators redefined my approach from anxious guesswork into confident, data-driven decision-making. But not all calculators are created equal, and understanding what happens behind the scenes makes all the difference between a system that barely functions and one that really powers your life.
Understanding What Solar Calculators Actually Calculate
At their core, solar calculators perform a series of interconnected calculations that mirror how energy flows through your entire system. They start with your energy consumption, translate that into battery storage requirements, decide how many solar panels you need to recharge those batteries, and finally specify the support equipment like charge controllers, inverters, and cables that tie everything together.
What really surprised me when I dug into this was discovering that most calculators make significant assumptions that can throw off your results by 20-30%. They often use annual average solar data when they should be using worst-month figures.
They assume perfect conditions when real-world losses from heat, dust, and inefficient components can dramatically reduce output.
Understanding these hidden assumptions changes you from someone blindly trusting calculator outputs to someone who can critically evaluate and adjust recommendations. The conceptual basis rests on energy balance, meaning the solar panels must generate at least as much energy as you consume, accounting for all the losses along the way.
But the practical application gets messy really quickly because those losses compound in ways that simple calculators do not capture.
The Hidden Mathematics Behind Energy Consumption
Before you can size anything, you need to know exactly how much power you use daily. This sounds straightforward until you actually start measuring.
Most people dramatically underestimate their consumption because they forget about phantom loads, which are devices that draw power even when supposedly off, and they do not consider seasonal variations.
The basic formula everyone uses is simple enough. Watts times hours equals watt-hours.
Run a 100-watt light bulb for 5 hours, and you have consumed 500 watt-hours.
But AC appliances throw a wrench into this calculation because solar systems operate on DC power.
The conversion ratio that shocked me when I first learned it is that 1 amp of AC power equals roughly 10 amps of DC power. This comes from the voltage difference between AC mains, which runs at 120V or 240V, and typical solar system voltages of 12V, 24V, or 48V.
When you run an AC device through an inverter in a DC system, you are converting between these voltage levels, and the current scales inversely.
Let me give you a concrete example. You have a microwave that draws 10 amps at 120V AC, which equals 1,200 watts of power.
To deliver that same 1,200 watts from a 12V DC battery bank, you need 100 amps of DC current.
But inverters are not perfectly efficient. They typically waste about 10% of the energy during conversion, so you actually need 110 amps from your batteries.
This is why proper DC load calculation matters so much more than people realize.
I recommend spending at least a week measuring your actual consumption with a Kill-A-Watt meter or similar device. Track every appliance, note when you use it, and build a realistic load profile.
This extra effort pays massive dividends later because everything downstream depends on getting this number right.
Peak Sun Hours and the Solar Radiation Reality
This concept really threw me for a loop initially. Peak sun hours are different from daylight hours, and understanding this difference is absolutely important for accurate panel sizing.
Peak sun hours represent equivalent hours of full-intensity sunlight at 1,000 watts per square meter. Your location might get 12 hours of daylight in summer, but the sun is only at peak intensity for maybe 5-6 of those hours.
Morning and evening sun hits at oblique angles with reduced intensity.
Clouds, climatic conditions, and seasonal sun path variations all affect the total energy available.
The Global Solar Atlas has become my preferred resource for finding accurate sunlight irradiance data. You type in your location, and it shows you monthly and annual averages for photovoltaic energy potential.
But most people make a critical mistake by using the annual average.
That might tell you 5.5 peak sun hours per day, averaged across the whole year, but December might only give you 3.2 hours, while July provides 7.8. If you size your system based on annual averages, you will have excess capacity in summer and severe underperformance in winter.
Unless you have a grid-tied setup with net metering that lets you bank summer credits for winter use, you need to size for your worst-case month.
This typically increases your required panel capacity by 40-60% compared to what naive calculations suggest.
Temperature effects compound this issue in ways that standard calculators completely miss. Solar panels are rated under standard test conditions at 25°C, which is 77°F.
For every degree Celsius above that, they lose about 0.4-0.5% efficiency.
If you are installing in Arizona where roof temperatures can hit 70°C or 158°F in summer, your panels might operate at 20-25% below their rated capacity because of heat alone.
Battery Sizing Beyond the Basics
The battery bank calculation represents one of the most consequential decisions in off-grid setup design, yet this is where I see the most confusion and mistakes.
The standard formula everyone learns is that battery capacity in amp-hours equals daily consumption in watt-hours divided by system voltage and depth of discharge. But this formula hides several important nuances.
Depth of discharge fundamentally changes depending on battery chemistry. Traditional flooded lead-acid batteries should never discharge below 50% if you want them to last more than a couple of years.
That means a 200 amp-hour battery only gives you 100 usable amp-hours.
Sealed AGM batteries can safely go to 70% discharge. Modern lithium iron phosphate or LiFePO4 batteries can discharge to 80-90% routinely without damage.
This difference completely changes system economics. Yes, lithium batteries cost three times more upfront than lead-acid, but they provide nearly twice the usable capacity per amp-hour and last three times longer.
When I ran the numbers for my own system, lithium actually came out cheaper over a 10-year period despite the higher initial cost.
The days of backup calculation are another area where personal circumstances matter enormously. Standard recommendations suggest 2-3 days of battery backup for off-grid systems.
But what if you live in the Pacific Northwest where you might see seven consecutive days of heavy cloud cover in winter?
What if your system supports critical medical equipment that absolutely cannot fail?
I learned this lesson the hard way during an unexpectedly long stretch of overcast weather. My supposedly adequate 2-day battery bank ran dangerously low on day four, forcing me to fire up a noisy generator at 2 AM.
Now I size for 5 days at least, understanding that the extra battery capacity costs far less than the strain and inconvenience of running short.
Solar Panel Array Configuration
Once you know your daily energy needs and battery capacity, determining panel wattage becomes mathematical, but the physical arrangement of those panels introduces new variables that calculators rarely address adequately.
The basic sizing formula divides daily consumption by peak sun hours and panel efficiency to get the required panel wattage. If you need 3,000 watt-hours daily, have 4 peak sun hours available, and assume 75% system efficiency, you need 3,000 divided by 4 times 0.75, which equals 1,000 watts of solar panels.
But should you use ten 100-watt panels or four 250-watt panels? The answer affects everything from mounting hardware costs to charge controller compatibility to shading vulnerability.
Series and parallel wiring fundamentally change system characteristics. Wiring panels in series adds their voltages while keeping the current constant.
Three 100-watt panels rated at 18V and 5.5A wired in series produce 54V at 5.5A.
Wiring the same panels in parallel keeps the voltage at 18V but adds current to 16.5A.
This matters tremendously for charge controller selection and output. MPPT charge controllers work most efficiently when panel voltage significantly exceeds battery voltage, making series configurations attractive.
But series strings are vulnerable to shading because one partially shaded panel reduces the output of the entire string.
Parallel configurations handle partial shading better but need heavier gauge wire to handle higher current.
Temperature derating also varies by configuration. That 54V series string I mentioned can spike to 70V or higher on a cold winter morning when measuring open-circuit voltage.
If your charge controller is rated for 60V input, you have just created a very expensive problem.
Mixed series-parallel configurations offer the best balance for medium-sized systems. Wire panels in series strings of 2-3, then parallel many strings together.
This approach elevates MPPT efficiency while maintaining reasonable voltage limits and partial shading tolerance.
Charge Controller Selection Strategy
The charge controller sits between your solar array and battery bank, regulating the charging process to prevent overcharge damage. This component selection directly affects system efficiency by 15-30%, yet many calculators treat it as an afterthought.
The two competing technologies, PWM and MPPT, operate based on fundamentally different principles. PWM controllers essentially connect your panels directly to your batteries when charging is needed, pulling the panel voltage down to battery voltage.
If your panels are rated for 18V but your 12V battery bank sits at 13V, the controller forces panels to operate at 13V, wasting that extra voltage potential.
MPPT controllers use sophisticated electronics to harvest energy at the panel's optimal voltage, then convert it to whatever voltage and current the batteries need. Those same 18V panels can operate at their most power point, typically around 15-16V, while the controller changes that to 13V at proportionally higher current. This voltage conversion captures 20-30% more energy from the same panels.
The sizing calculation for charge controllers needs to account for the most current plus a safety margin. If you have 1,000 watts of panels on a 12V system, that equals 83 amps at rated capacity. Multiply by 1.3 for the safety factor, and you need a controller rated for at least 108 amps.
But solar panels are able to momentarily exceed rated output in ideal conditions.
I have measured 110-115% of rated power on cold, clear days with fresh snow reflecting extra light onto panels. Most people undersize their charge controllers based on nameplate ratings and then wonder why the controller goes into thermal protection and throttles output on the best solar days.
I now add a 1.5× safety margin instead of the standard 1.3×, and I have never had a controller limit my harvest since making that change.
Inverter Sizing and Selection
The inverter converts DC battery power to AC for running standard household appliances. This component faces perhaps the most complex sizing requirements because it must handle both continuous loads and momentary surge demands.
Continuous wattage represents steady-state power draw, like the 200 watts your refrigerator uses while running, the 100 watts of LED lighting, and the 50-watt laptop charger. Surge wattage represents startup current for motors and compressors.
That same refrigerator might need 1,200 watts for the two seconds its compressor motor starts, even though it only draws 200 watts while running.
Standard calculators tell you to add up all your loads and multiply by 1.25 for inverter inefficiency. But this approach does not capture real-world usage patterns.
Are you really running every appliance simultaneously?
Probably not. Yet many people oversize inverters dramatically by summing theoretical maximum loads that never occur in practice.
I recommend building an actual load profile that tracks power consumption hour by hour through a typical day. You will likely find out that peak consumption occurs during a specific 2-3 hour window, maybe dinner preparation and evening activities.
Size your inverter for that realistic peak, not the theoretical sum of every possible load.
The efficiency curve of inverters represents another factor that basic calculators miss entirely. Inverters achieve peak efficiency at 50-80% of rated capacity.
A 3,000-watt inverter running a 300-watt load might operate at only 70% efficiency, wasting 30% of the energy as heat.
That same 300-watt load on a 1,000-watt inverter might run at 88% efficiency.
This realization led me to install two inverters in my current system. A small 600-watt unit runs 24/7 for lights, refrigerator, and electronics at high efficiency, plus a larger 3,000-watt unit that only powers up when I need to run power tools or the well pump.
My overall system efficiency improved by nearly 12% after making this change.
System Voltage Selection
Choosing between 12V, 24V, and 48V system voltage might seem arbitrary, but it affects wire gauge requirements, component availability, efficiency, and ultimately system cost.
Current flow decreases proportionally as voltage increases for the same power level. A 1,200-watt load draws 100 amps at 12V, 50 amps at 24V, or 25 amps at 48V.
Wire gauge requirements scale with current, so higher voltage systems use thinner, cheaper wire for the same power transmission.
Voltage drop in cables scales with current as well. That 100-amp current in a 12V system loses far more energy to wire resistance over any given distance than 25 amps in a 48V system.
For systems where batteries are located more than 10-15 feet from solar panels or inverters, 48V systems dramatically reduce cable losses.
But higher voltage systems come with trade-offs. Component availability favors 12V and 24V for small systems because you will find far more charge controllers, inverters, and accessories designed for these voltages.
Safety considerations increase with voltage.
While 12V is fairly safe to work with, 48V systems approach levels that can deliver dangerous shocks if mishandled.
I generally recommend 12V only for very small systems under 1,000 watts where everything is located close together. Systems from 1,000-3,000 watts work well at 24V.
Anything larger really benefits from 48V despite the higher component costs and reduced part availability.
Frequently Asked Questions
How do I calculate how many solar panels I need for my house?
Start by determining your daily energy consumption in kilowatt-hours from your utility bills, then divide by the peak sun hours in your location and multiply by 1.25 to account for system losses. For example, if you use 30 kWh daily and have 5 peak sun hours, you need about 7.5 kW of solar panels.
What size battery bank do I need for off-grid solar?
Calculate your daily watt-hour consumption, multiply by the number of backup days you want, typically 3-5 days, then divide by your system voltage and the depth of discharge your battery chemistry allows. Lead-acid batteries should only discharge to 50%, while lithium can safely go to 80-90%.
Can I use annual average sun hours to size my solar system?
No, you should use your worst-month sun hours for off-grid systems to confirm adequate power during winter. Annual averages lead to undersizing by 40-60%, leaving you with not enough power during low-sun months when you need heating the most.
What is the difference between MPPT and PWM charge controllers?
PWM controllers pull your panels down to battery voltage, wasting higher panel voltage potential. MPPT controllers harvest energy at the panel's optimal voltage and convert it to match battery needs, capturing 20-30% more energy from the same panels.
How do I size wire for my solar panels?
Calculate the current your panels will produce, double the distance to account for both positive and negative wires, and use a voltage drop calculator to decide the minimum wire gauge that keeps losses below 2-3%. Going one size larger than calculated minimum improves efficiency.
Do solar panels lose efficiency in hot weather?
Yes, panels lose about 0.4-0.5% of their rated output for every degree Celsius above 25°C. In hot climates where roof temperatures reach 70°C, panels can operate 20-25% below their rated capacity.
Should I oversize my solar system for future needs?
Absolutely. Panels degrade 0.5-0.8% annually, and your energy needs will likely grow over time.
I recommend oversizing by 20-30% to accommodate degradation and usage increases without requiring system modifications later.
What system voltage should I choose for my solar setup?
Systems under 1,000 watts work fine at 12V. Systems from 1,000-3,000 watts perform better at 24V.
Anything larger benefits from 48V because higher voltage reduces current, which means smaller wire sizes and lower cable losses.